HOW TO CHANGE THE LOCATION OF YOUR IPHONE BACKUP ON A MAC
HIRZA PIMENTEL ▪ 03/10/2018
Last weekend, I tried to install MongoDB on my Mac, when I got an error saying that I needed to upgrade my operating system to be able to continue. I have actually been postponing upgrading, since I only have 10GB of free storage on my hard drive, and I haven't had time to move my files to our NAS. So what was supposed to be a simple task of installing an application, turned into hours of moving photos, videos, and music to our NAS, backing up my devices, updating my OS and installing the application.
After making sure that all my photos, videos and music are backed up on our NAS, I deleted them from my Mac. But there's still 140 GB being in Other Storage. As it turned out, 70 of the 140 GB is being used by my iPhone backup. So I searched online to see if it's possible to change my mobile back up location to a NAS, and found some instructions on how to change the location to an aternate location by going to the terminal and typing something like this:
ln -s /Volumes/
Going to the Terminal can be daunting to some and I've had issues getting the above command to work for our NAS so I'm writing this up to help those who want to change their backup to an alternate location without using the Terminal
INSTRUCTIONSSHOW
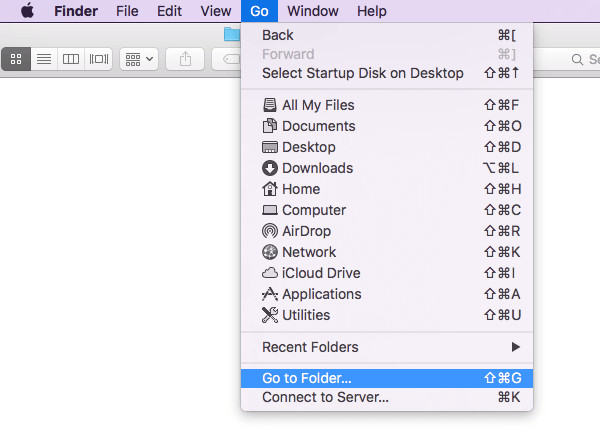
- Go to the original iPhone Backup folder by opening Finder, clicking Go on the menu and selecting "Go to folder..."
- Enter the following path and click Go.
~/Library/Application Support/MobileSync/ - Open a different Finder window, click Go on the menu, and select "Go to folder..." again but enter the path for the alternate location.
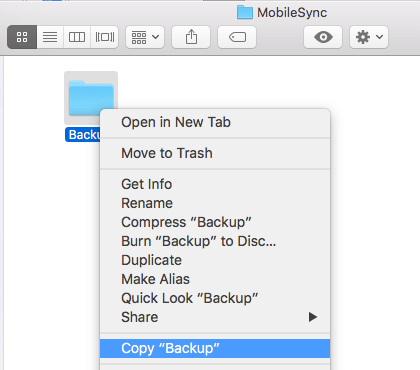
- In the first Finder window (MobileSync), right click on the Backup folder and click Copy
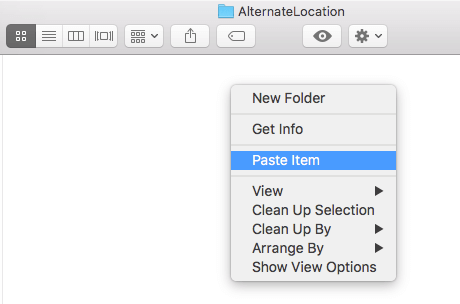
- In the second Finder window (alternate location), right click on the window and click Paste Item
- In the first Finder window (MobileSync), right click on the Backup folder and click Rename. Type in OldBackup and hit enter. Note that you can delete this folder once you're able to check that the new backup location works.
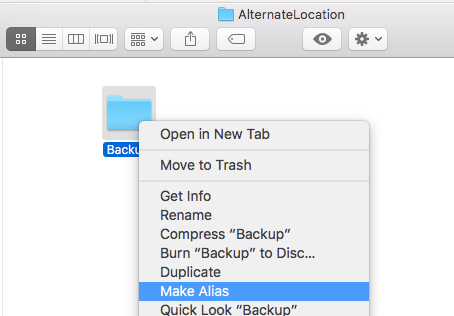
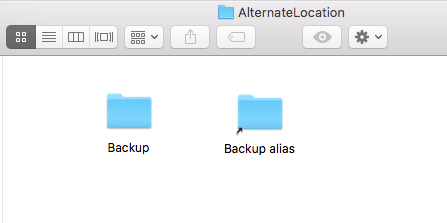
- In the second Finder window (alternate location), right click on the Backup folder and select Make Alias.
- Notice that a new file with an arrow on the icon is created in the second Finder window (alternate location).
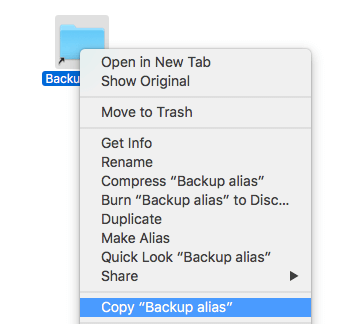
- In the second Finder window (alternate location), right click on the Backup Alias file and click Copy Backup Alias.
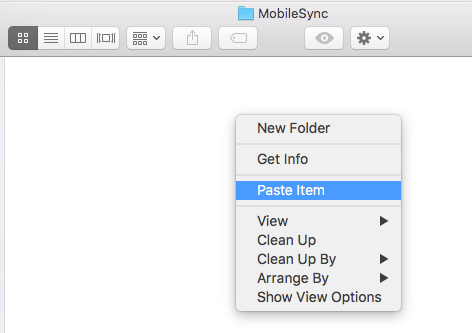
- In the first Finder window (MobileSync), right click on the window and click Paste Item
That's it! Go to iTunes, connect your device, and make sure you are able to back up your device using the new location. Once you've successfully created a backup, feel free to delete the OldBackup folder from the first Finder window.


